
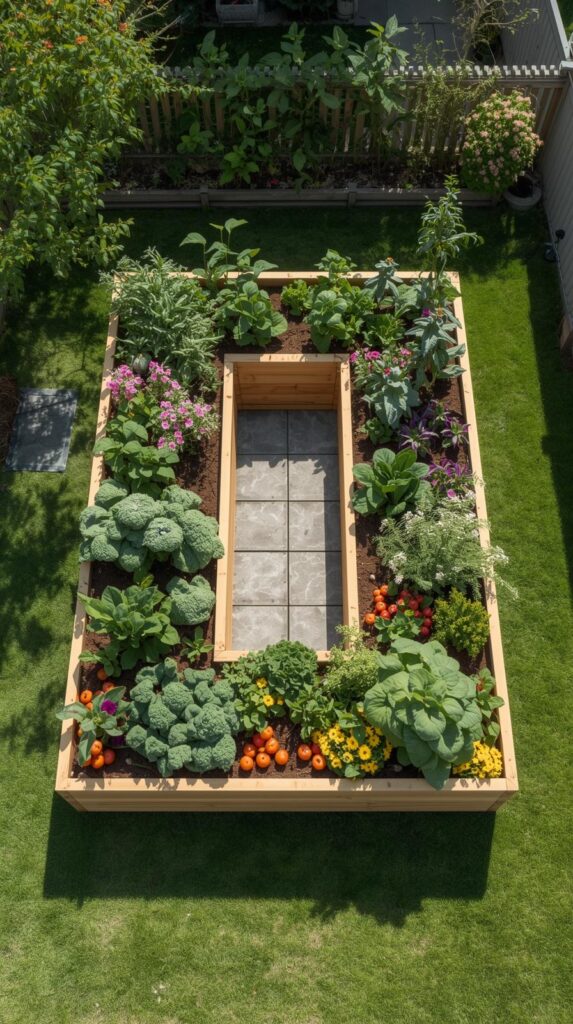
You know that feeling when you’re squatting in your garden, knees screaming, back aching, wondering why you thought ground-level gardening was a good life choice? Raised garden beds fix that—and so much more. They give you better drainage, warmer soil that wakes up faster in spring, and actual control over what your plants are growing in. No more fighting clay or sand you didn’t ask for. They look intentional, keep weeds manageable, and turn any patch of yard into a proper growing space. Here’s everything you need to know.
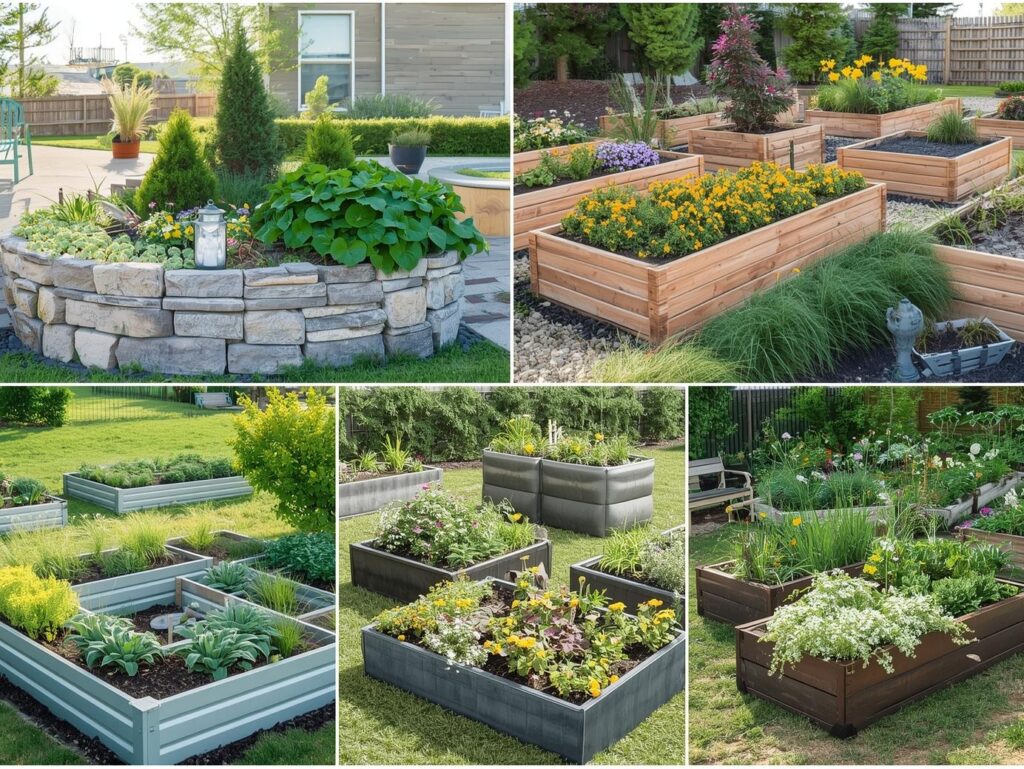
1. Cedar Raised Beds for the Long Haul
Cedar costs more upfront, but it’s the friend who actually shows up when you need them. This wood naturally resists rot and bugs without chemical treatments, so you’re not wondering what’s leaching into your tomato roots. A cedar bed can last 10-15 years with zero maintenance beyond the occasional dusting off of leaves and existential dread.
Why cedar wins over pine: Pine needs treatment to survive more than two seasons, and treated lumber near edibles makes some gardeners twitchy. Cedar weathers to a gorgeous silvery gray that looks expensive without trying.
Best height for less bending: Go for 24-30 inches tall if your back has opinions about gardening. You’ll spend more on materials, but your spine will write thank-you notes. Shorter beds work fine if you’re young, optimistic, or very into squats.
Read More: 21 Stunning Thanksgiving decor ideas for your home
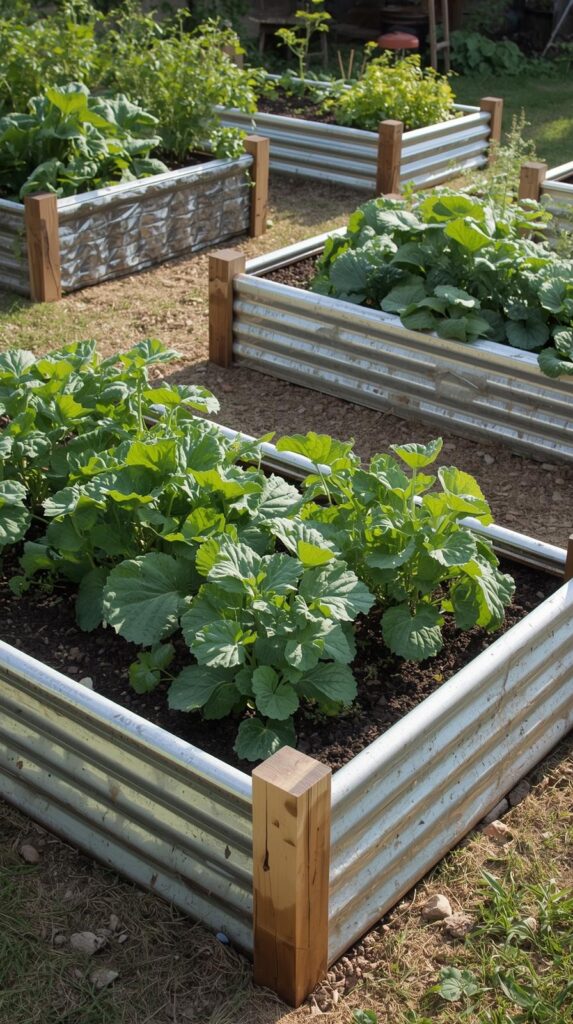
2. Galvanized Metal Beds That Look Ridiculously Good

Metal raised beds showed up and said “we’re here to look sharp and outlast your commitment to sourdough.” Galvanized steel won’t rot, splinter, or host termites, and it brings that modern farmhouse vibe Pinterest dreams are made of. They heat up faster in spring, which cool-climate gardeners love and desert gardeners need to plan around.
Round vs. rectangular: Round galvanized beds soften hard landscaping and fit awkwardly shaped spaces like pros. Rectangular ones maximize growing space and line up neatly if you’re into that organized garden look.
Watch the afternoon sun: Metal conducts heat, so roots near the edges can cook in blazing sun. Add extra mulch around the perimeter or position beds where they’ll get afternoon shade. Your lettuce will thank you by not bolting in May.
Read More: 21 Coastal Christmas Decorations That’ll Make Your Beach House Merry
3. Composite Material Beds for the Zero-Maintenance Crew
Composite lumber is recycled plastic and wood fiber having a baby that never rots. These beds cost more than basic wood but require literally zero upkeep—no staining, no sealing, no weekend projects you’ll avoid for three months. They look like wood, act indestructible, and laugh at weather.
Color choices matter: Darker composites absorb more heat, which northern gardens appreciate and southern gardens need to consider carefully. Lighter colors stay cooler and often look cleaner longer, though they may show dirt more readily.
Weight is your friend: Composite beds are heavy, which sounds annoying until you realize they’re not going anywhere in a storm. No shifting, no gradual sinking into soft ground. Set them once and forget about adjustments forever.
Read More: 21 Genius Shoe Storage Ideas for Every Home
4. Stacked Stone Beds That Scream Permanent Garden Goals
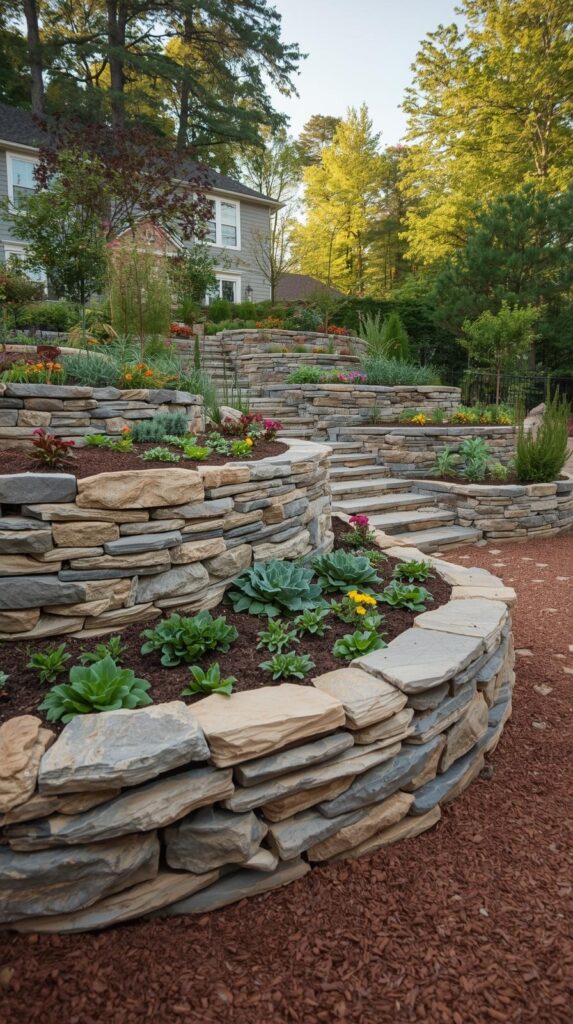
Stacked stone or concrete block beds are the garden equivalent of getting that tattoo you’ve wanted forever—they’re staying put, so choose your spot wisely. They provide incredible drainage, warm up beautifully in spring, and look like you hired a landscaper even when you absolutely didn’t.
Dry-stack vs. mortared: Dry-stacked stone lets you adjust things and provides drainage between blocks. Mortared beds are truly permanent and won’t shift, but they’re harder to modify if you change your mind about that tomato placement.
Height planning: Going above 18 inches with stone means considering structural support. Gravity has opinions about tall stone walls. Shorter beds avoid engineering headaches and still give you most benefits, including keeping rabbits confused about entry points.
Read More: 21 Clever Garage Storage Ideas for Small Spaces
5. Keyhole Gardens for Maximum Efficiency and Showing Off
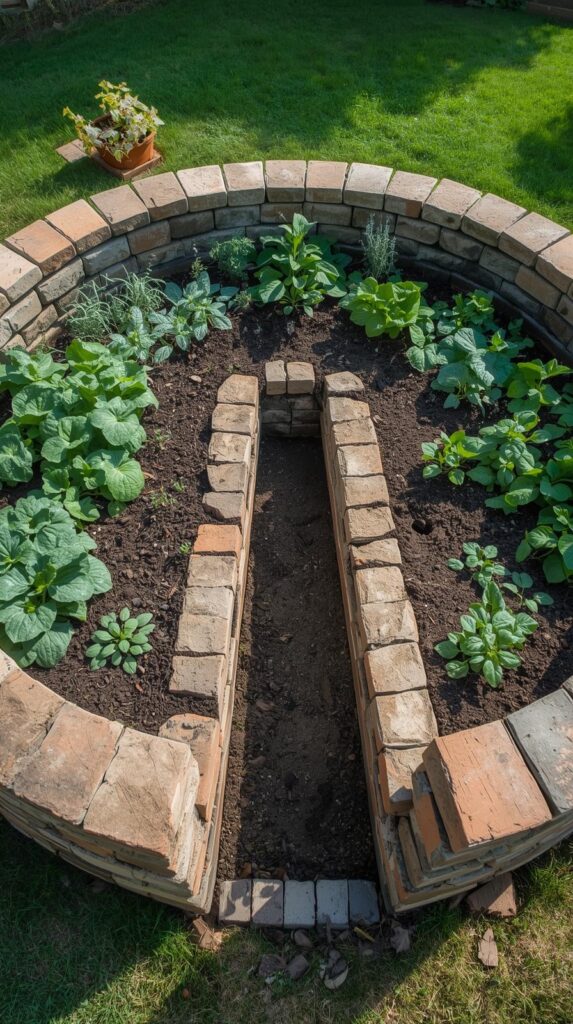
Keyhole gardens look like someone took a round raised bed and cut a slice for access to a central compost basket that feeds everything. You walk into the center, dump kitchen scraps, and nutrients spread outward while you harvest from all sides. It’s gardening geometry that actually makes sense.
Perfect for small spaces: A 6-foot diameter keyhole bed produces shocking amounts of food in minimal square footage. The composting center means you’re constantly feeding the bed without hauling amendments around like some kind of garden packhorse.
Build the center right: Use wire mesh or a ventilated plastic basket for the compost core—it needs airflow. Line it with straw or cardboard to keep things from falling through while materials break down and feed your plants dinner.
Read More: 21 Hat Storage Ideas That’ll Make Your Home Look Magazine-Worthy
6. Hugelkultur Beds That Use Logs You’d Otherwise Burn
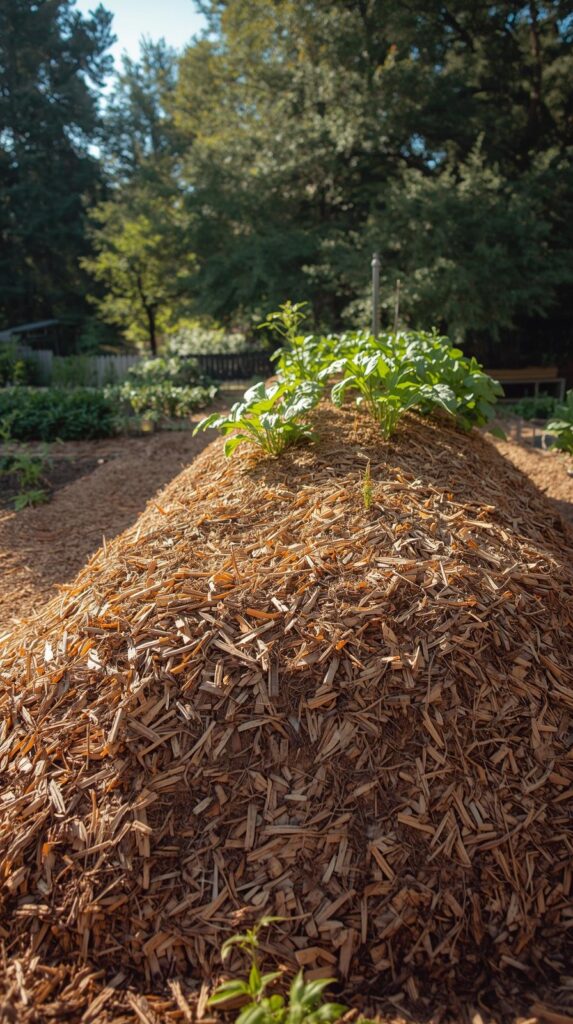
Hugelkultur is German for “hill culture” and involves burying logs and branches under your garden bed like you’re creating a wooden sponge that slowly feeds plants. Sounds weird, works beautifully, uses yard waste productively. The wood breaks down over years, holding moisture and releasing nutrients.
Start with hardwood logs: Softwoods work but break down faster. Hardwoods like oak create structure that lasts, though they take longer to decompose. Avoid black walnut—it’s juglone content murders tomatoes and other plants without remorse.
Layer like lasagna: Logs on the bottom, smaller branches next, then leaves and grass clippings, then compost and soil. The mound settles as wood decomposes, so build it taller than you think necessary. Water less often because buried wood holds moisture like a secret.
Read More: 21 Blanket Storage Ideas That’ll Save Your Sanity
7. Corrugated Roofing Panel Beds on a Budget
Leftover metal roofing panels make shockingly good raised beds for almost no money. They’re already designed to handle weather, they last forever, and that corrugated texture adds unexpected visual interest. Hardware stores often have dented or discontinued panels on clearance that work perfectly.
Stabilize the corners: Use wooden or metal stakes driven into the ground at each corner to keep panels from bowing outward when you fill them with soil. Soil is heavy and has plans to escape.
Height sweet spot: Keep these beds under 18 inches tall. Roofing panels aren’t structural powerhouses, and soil pressure increases with height. Shorter beds stay stable, drain well, and still save your back from ground-level gardening torture.
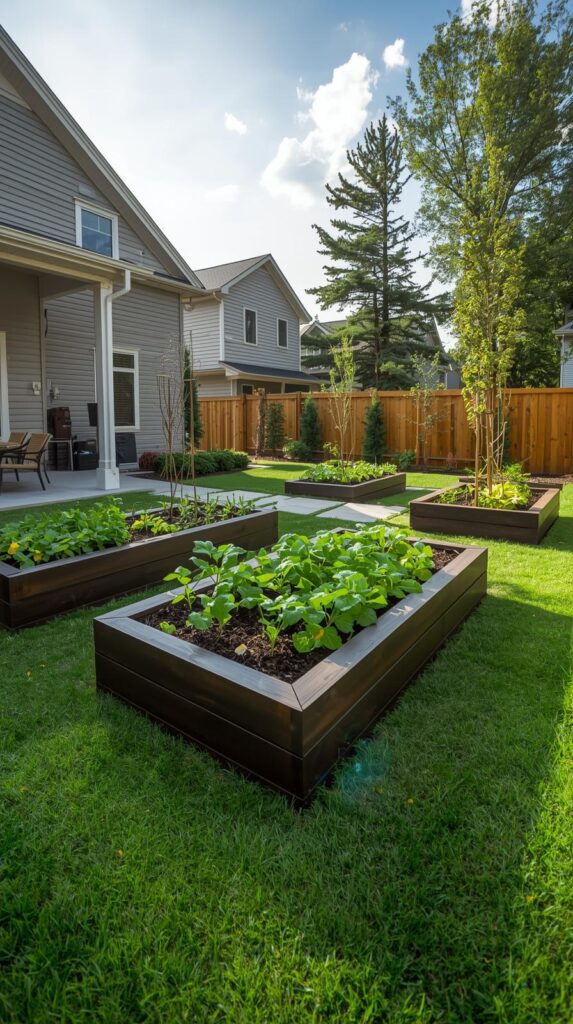
8. Brick Raised Beds for Classic Garden Beauty
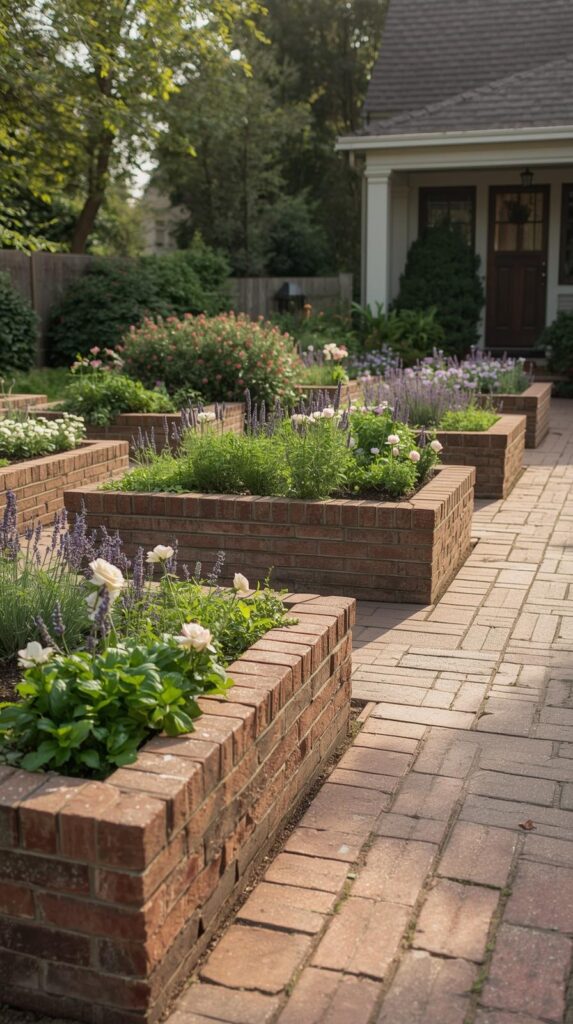
Bricks bring timeless garden elegance that looks intentional whether your style is cottage garden chaos or formal herb rows. They absorb heat during the day and release it at night, extending your growing season slightly. Used bricks add character; new ones add uniformity. Both work beautifully.
Mortared stability: Dry-stacked bricks shift and settle. Mortaring them creates permanent beds that won’t need adjustment. It’s more work upfront but eliminates the annual “why is this corner sinking” inspection tour every spring.
Single vs. double width: Single brick width works for shorter beds up to 12 inches. Go double width for taller beds—you need that extra stability when soil weight starts having opinions about your construction choices.
9. Elevated Table-Height Beds for Accessible Gardening
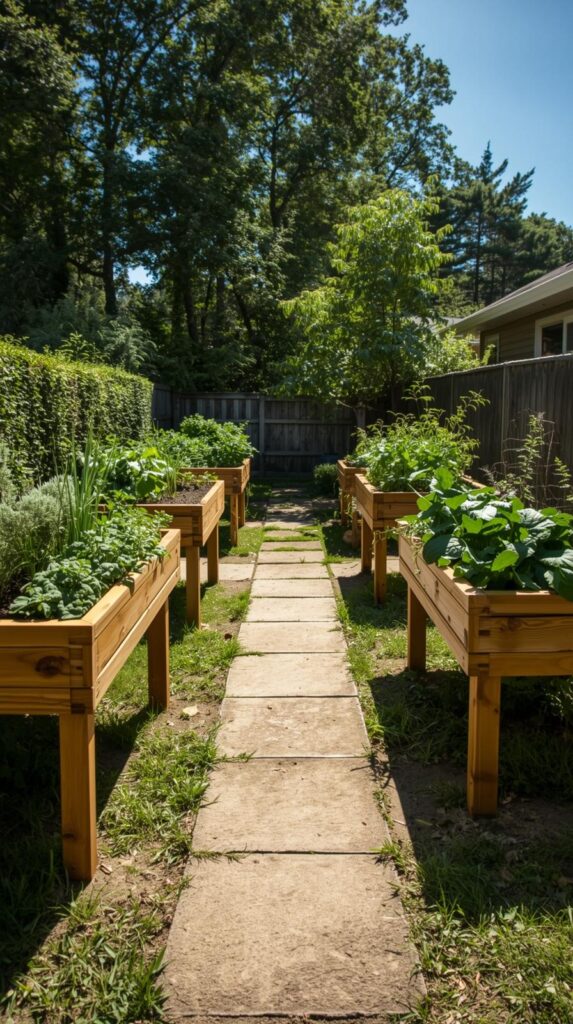
Table-height beds—usually 30-36 inches—are game-changers for anyone with mobility issues or anyone who’s tired of their garden feeling like a floor workout. You can sit while you garden, reach everything easily, and actually enjoy the process instead of counting down until you can stand up again.
Wheelchair accessibility: Build these 28-30 inches high with space underneath for wheelchair footrests. Make them narrow enough to reach across—24 inches works well. Your garden should welcome everyone, not create obstacle courses.
Drainage is critical: These beds dry out faster because they’re exposed on all sides. Use soil with good moisture retention, mulch heavily, and consider self-watering systems if you’re not home daily to check things.
10. Self-Watering Raised Beds for Forgetful Gardeners
Self-watering beds have a water reservoir at the bottom that wicks moisture up through the soil, which means you water less often and plants get consistent moisture. They’re brilliant for vacations, busy schedules, or that week you forgot you had plants because work ate your brain.
How they actually work: A perforated pipe or gravel layer holds water below the soil. Wicking columns or fabric pulls moisture upward. Plants take what they need, you refill the reservoir weekly instead of watering daily.
Not for all plants: Root vegetables and plants that prefer drier conditions can get mushy feet. These beds excel with tomatoes, peppers, greens—anything that appreciates consistent moisture without being waterlogged. Know your plants’ preferences before committing.
11. Corner Raised Beds That Use Wasted Space
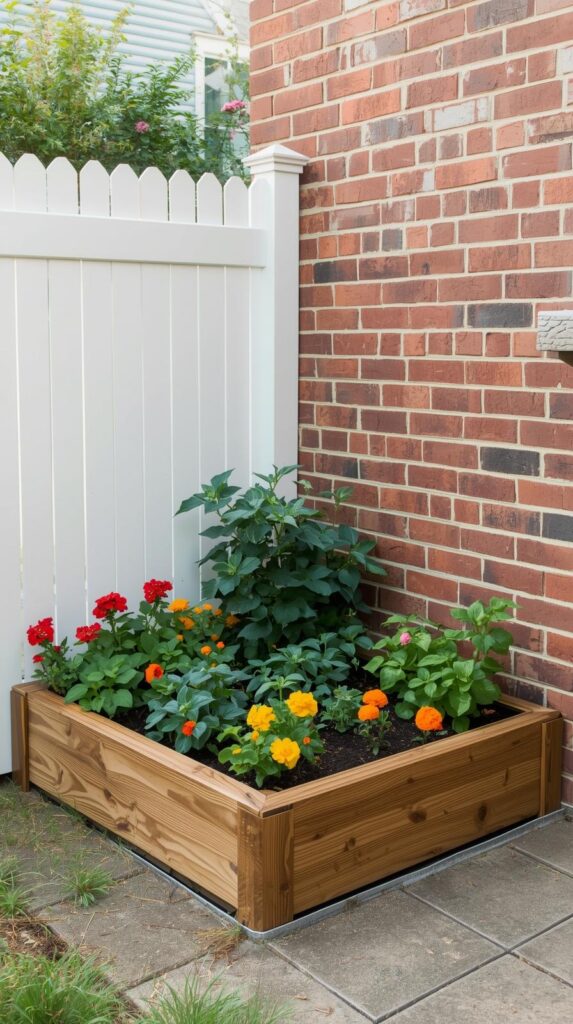
That awkward corner where your fence meets your house? Corner beds turn dead space into productive growing areas while softening hard angles in your landscape. They look intentional, create microclimates (warmer near the house, usually), and make use of every available square foot.
Angle matters: Right-angle corners fit tight spaces but can be harder to reach into. Consider a curved or angled front edge for easier access to plants in the back without performing circus acts.
Foundation concerns: Make sure water drains away from your house foundation. Add a gap between the bed and the house wall, or use careful waterproofing. Wet foundations develop opinions you don’t want to hear from your insurance company.
12. Tiered Raised Beds for Vertical Growing Drama
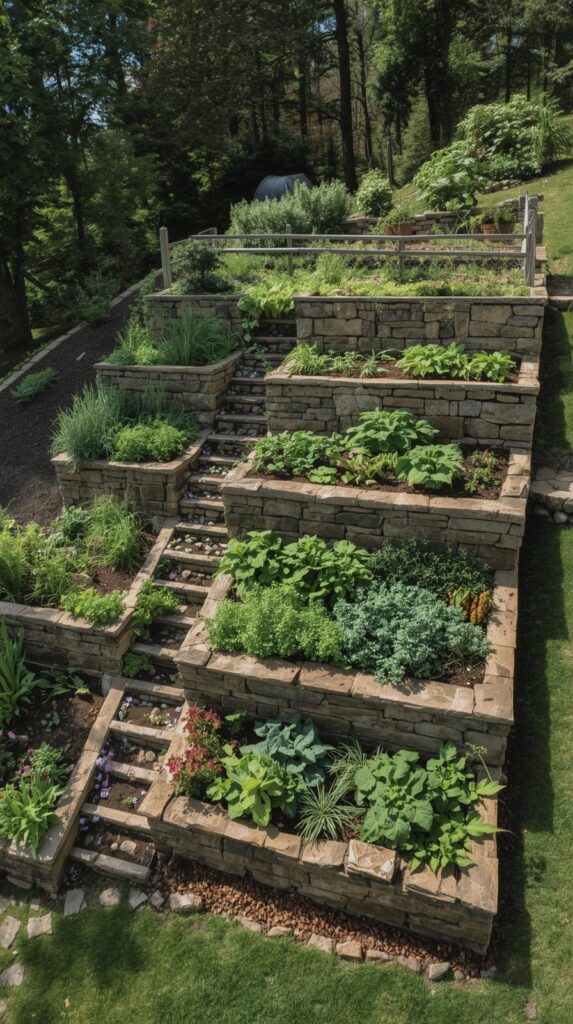
Tiered beds stack like stairs, creating multiple planting levels that look impressive and solve drainage puzzles. Upper tiers naturally drain into lower ones, you can match plants to sun exposure, and the visual impact is pure Pinterest gold. They turn slopes into assets instead of problems.
Sun-exposure planning: Put heat-lovers like tomatoes and peppers on top where sun hits hardest. Lettuce and shade-tolerant herbs go lower where upper tiers create afternoon shade. Work with your microclimates instead of fighting them.
Structural support needed: Each tier must support the weight of the one above it. Use sturdy materials and stake or anchor beds into the ground. Gravity and soil weight team up to test your construction skills.
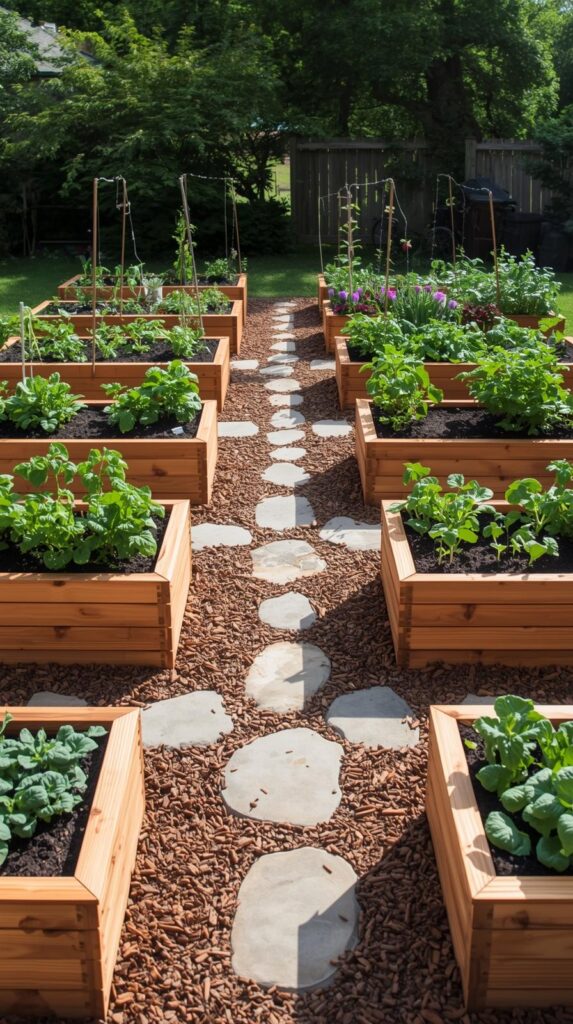
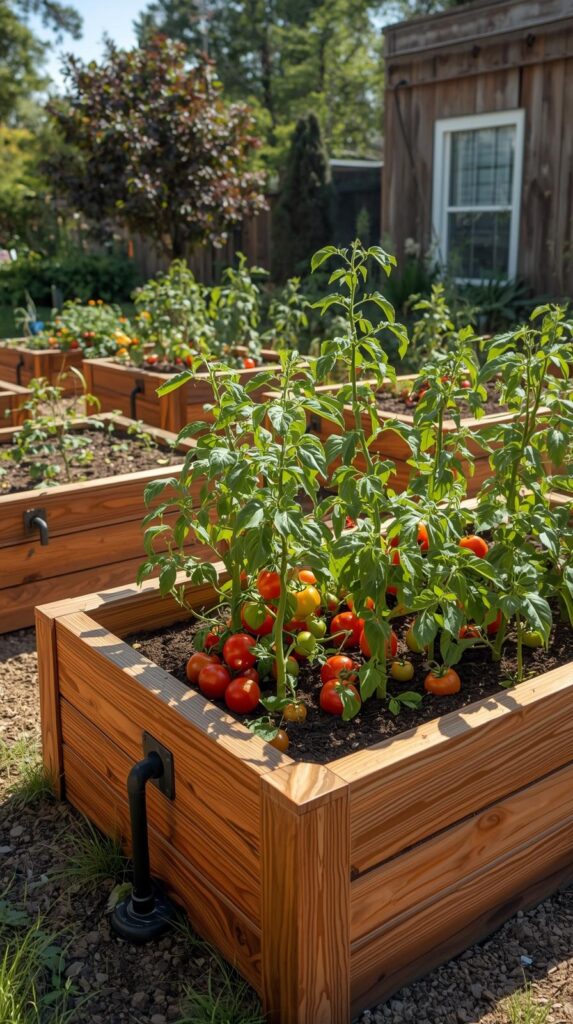
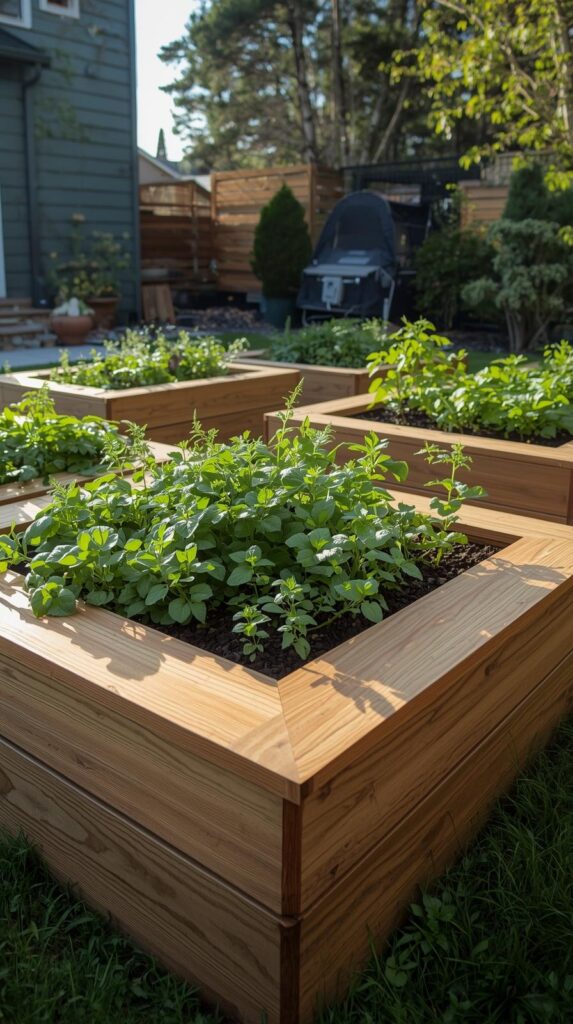
13. Rectangular Beds in Production Garden Rows
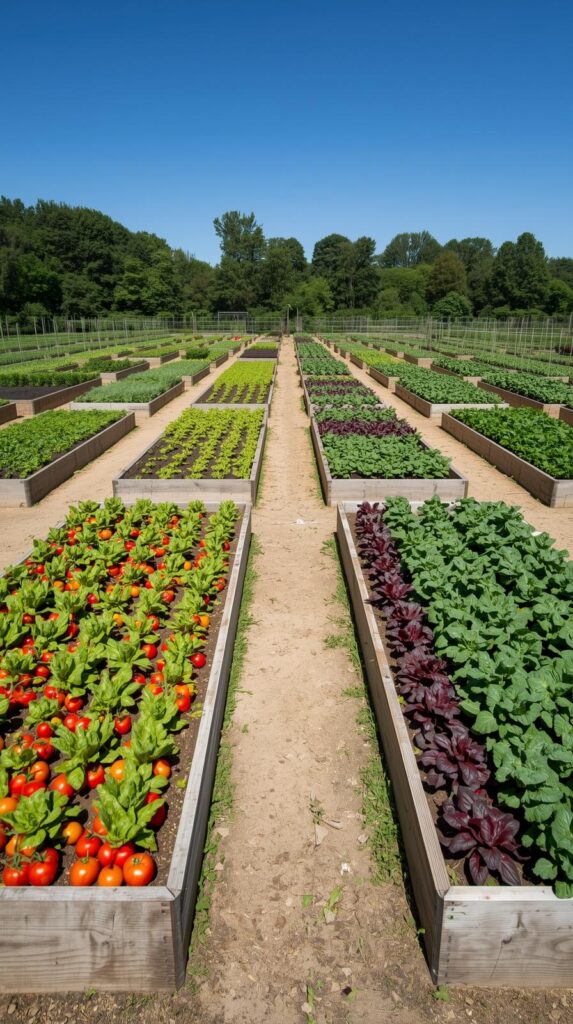
Simple rectangular beds in parallel rows are the no-nonsense choice for serious food production. They maximize growing space, allow efficient crop rotation, and look organized in that satisfying way that makes you feel like a real farmer even when you’re just growing enough tomatoes to annoy your neighbors with gifts.
Standard dimensions: Four feet wide lets you reach the center from either side without stepping on soil. Length is your choice, but 8-10 feet keeps things manageable. Leave 2-3 feet between rows for walking, weeding, and harvest access.
Rotation made easy: Multiple identical beds let you rotate plant families annually to manage pests and soil nutrients. Last year’s tomato bed becomes this year’s bean bed. Your soil stays healthier, and pests get confused about where their food went.
14. Half-Barrel Raised Beds for Moveable Garden Spots
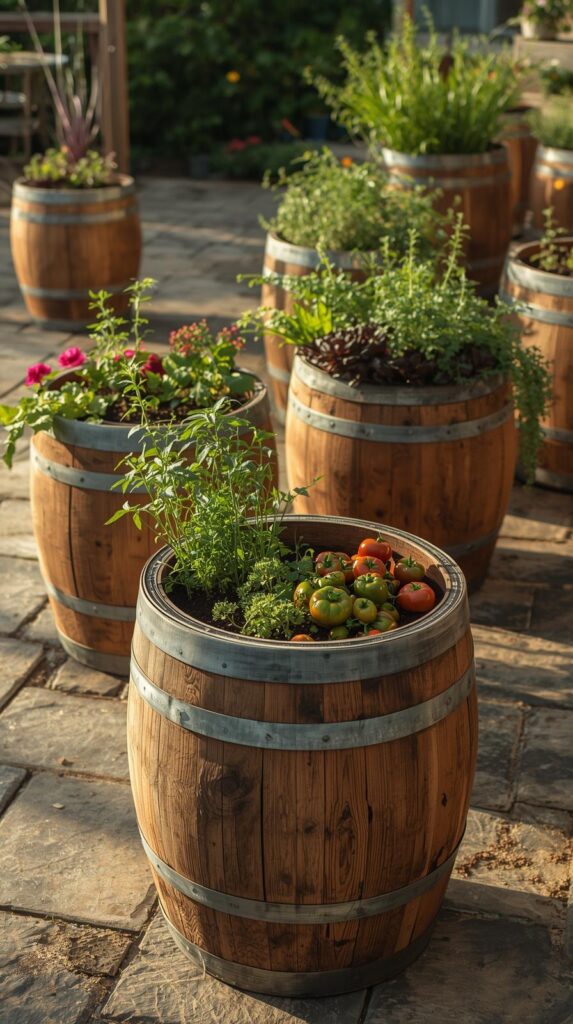
Whiskey barrels cut in half make instant raised beds with built-in charm and the bonus of portability—sort of. They’re heavy when filled but possible to relocate if you have regrets or discover that spot gets less sun than you thought. They suit patios, decks, and anywhere a full bed feels too committed.
Drainage holes are mandatory: Drill several large holes in the bottom unless you enjoy growing a pond instead of plants. Standing water kills roots faster than neglect, and that’s saying something.
Limited depth consideration: Half-barrels give you about 12 inches of soil depth, which works for most vegetables but challenges deep-rooted things like carrots or parsnips. Choose your plants accordingly, or fill the bottom with gravel to reserve root space.
15. Cinder Block Beds That Cost Almost Nothing
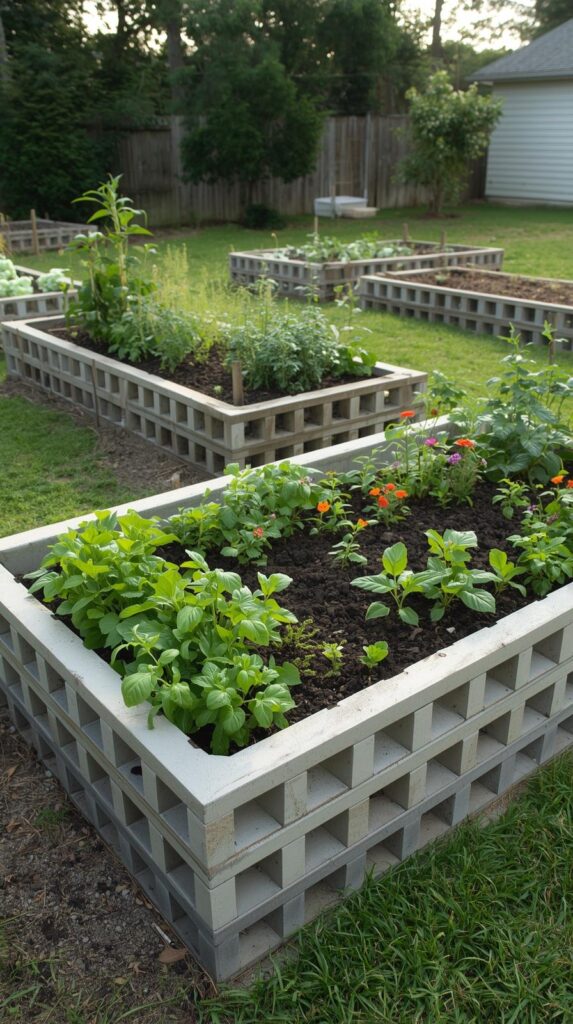
Cinder blocks make ridiculously cheap raised beds that look better than you’d expect and offer bonus features—those holes are perfect for planting herbs or flowers. Stack them two or three high, fill the center with soil, and you’re gardening. No fancy carpentry skills required.
Fill or don’t fill the holes: Holes can host trailing herbs, flowers, or compact plants. Or fill them with rebar for extra stability on taller beds. Or ignore them completely—they drain well either way.
Concrete concerns: Some gardeners worry about concrete leaching into soil. Research is mixed, but if you’re concerned, line the interior with landscape fabric as a barrier. Or use cinder blocks made from natural materials if you can source them locally.
16. L-Shaped Beds for Corner Properties and Flow
L-shaped beds wrap around corners or define spaces while creating natural pathways through your garden. They’re perfect for corner lots, areas where you want to separate zones, or when you need a raised bed that does double duty as a subtle fence.
Traffic flow planning: The inside of the L should be your pathway—make it wide enough to walk comfortably with a basket or wheelbarrow. The beds become walls that guide movement without feeling fenced in.
Planting strategy: Taller plants go on the outside of the L where they won’t shade shorter plants. Keep frequently harvested items on the inside for easy access. Think about your daily movement patterns before committing to the layout.
17. Raised Beds with Built-In Trellises for Vertical Crops
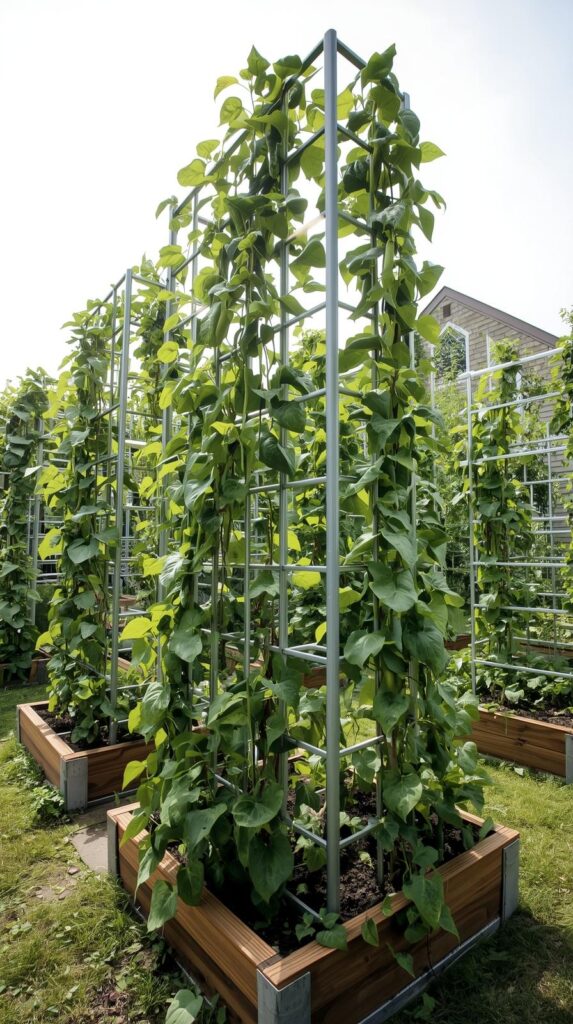
Beds with attached trellises maximize space by growing up instead of out, which matters when your yard is less “sprawling garden” and more “postage stamp with aspirations.” Cucumbers, beans, peas, and indeterminate tomatoes love vertical support and produce more when they’re climbing.
Trellis strength matters: Use sturdy posts set deep—2-3 feet into the ground minimum. Vining plants loaded with produce get heavy, and wind has opinions. Flimsy trellises fall over mid-season, crushing dreams and cucumber vines.
North-side placement: Put trellises on the north side of beds so they don’t shade other plants. Southern hemisphere gardeners, reverse that advice. Let physics and sun paths work for you instead of creating accidental shade gardens.
18. Raised Beds with Integrated Seating Edges
Beds with wide, flat edges that double as seating are genius for anyone who gardens socially or needs frequent breaks. Build 4-6 inch wide caps on bed walls, and suddenly your garden is also a gathering space. You can sit while you weed, chat while you harvest, or rest while you contemplate your slug-battle strategy.
Smooth it out: Sand and seal wood edges or use smooth composite material so clothing doesn’t snag. Nobody wants their favorite jeans developing garden-edge battle scars.
Weight distribution: Seating edges need extra support underneath. Add cross-bracing or use thicker material. Beds that collapse when you sit on them are memorable for all the wrong reasons.
19. Raised Beds with Greenhouse Hoops for Season Extension
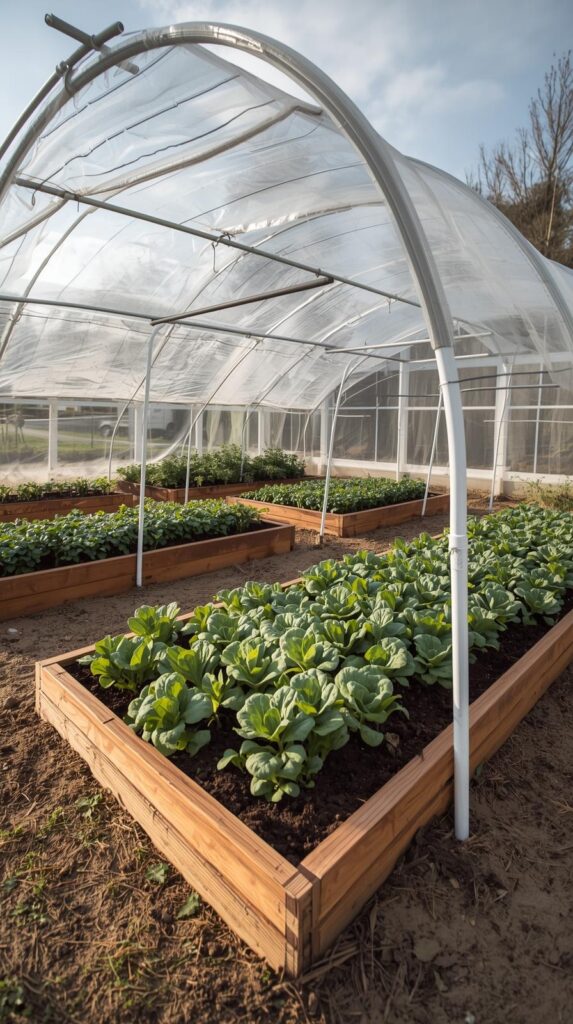
Beds designed to accept PVC hoops that support row covers or plastic sheeting extend your growing season by weeks on both ends. Add the hoops when frost threatens, remove them when weather warms. Your lettuce grows through light freezes, and you’re harvesting while neighbors are still dreaming about spring.
Attachment method: Pre-drill holes in bed corners or attach external brackets before you fill the bed with soil. Trying to add hoop supports later involves digging around established plants while using creative vocabulary.
Removable covers: Use clips or clamps that let you quickly remove covers for watering, harvesting, or when that surprise 70-degree February day shows up. Trapped heat under covers can cook plants faster than summer sun.
20. Serpentine Curved Raised Beds for Artistic Layouts
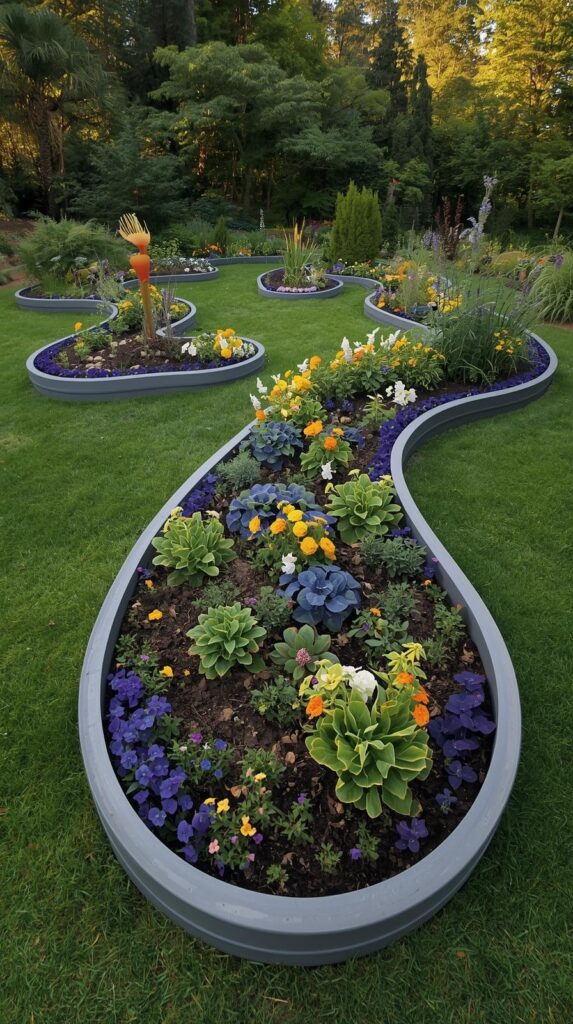
Curved, flowing beds break up the straight-line garden aesthetic and create visual interest that photographs beautifully. They soften landscapes, work with natural terrain, and prove your garden has personality beyond efficient vegetable production. Bonus: curves naturally slow foot traffic, so people actually notice your plants instead of walking past.
Flexible materials required: Bender board, flexible metal edging, or thin composite material bends without breaking. Wood doesn’t curve—accept this or embrace very gentle curves made from short, angled sections.
Curve purpose: Make curves intentional, not random squiggles. Use them to guide pathways, wrap around focal points like trees or fountains, or create distinct garden rooms. Purposeful curves look designed; random curves look confused.
Final Thoughts
Your garden deserves better than dirt-level disappointment and chronic back pain. Raised beds solve real problems while looking intentional, whether you’re working with perfect loamy soil or clay that moonlights as pottery material. Start with one bed—whatever material calls to you—and see how it changes your gardening life. You can always add more once you realize ground-level gardening was a choice you’re allowed to unmake. Your vegetables will grow, your back will thank you, and your garden will finally look like the Pinterest vision you’ve been scrolling past for three years. Go build something.