

Your garage probably looks like a tornado hit a hardware store, right? Bikes tangled with garden hoses, mystery boxes stacked to the ceiling, and that one corner where you’re pretty sure something’s living. You’re not alone – most garages become dumping grounds faster than you can say “I’ll organize it later.” But here’s the good news: turning that disaster zone into an actually functional space doesn’t require a magic wand or a mortgage-sized budget. You just need smart storage ideas that work with your stuff, not against it. Ready to reclaim your garage and maybe even park your car in there again?
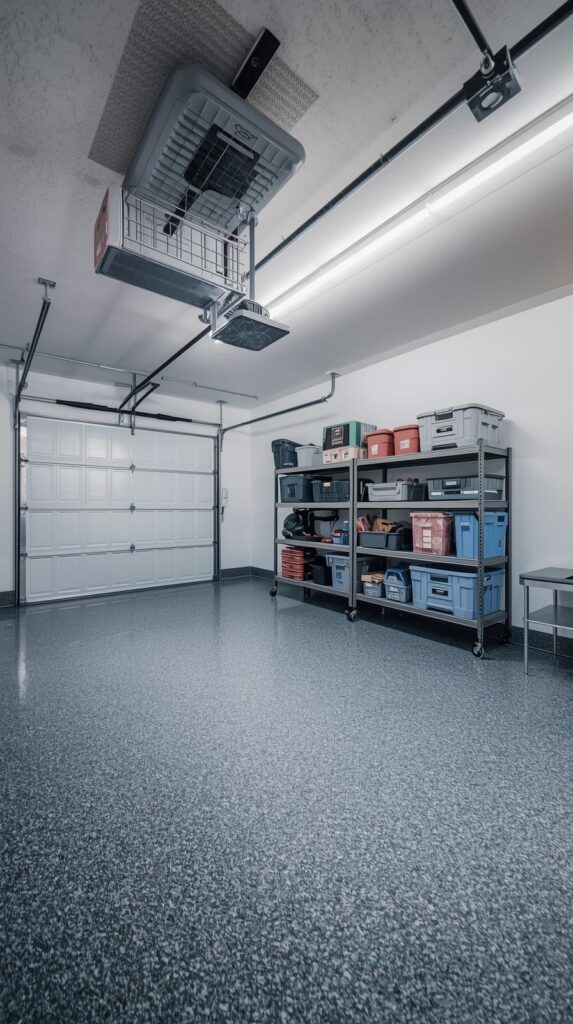
1. Install Overhead Ceiling Racks for Seasonal Storage
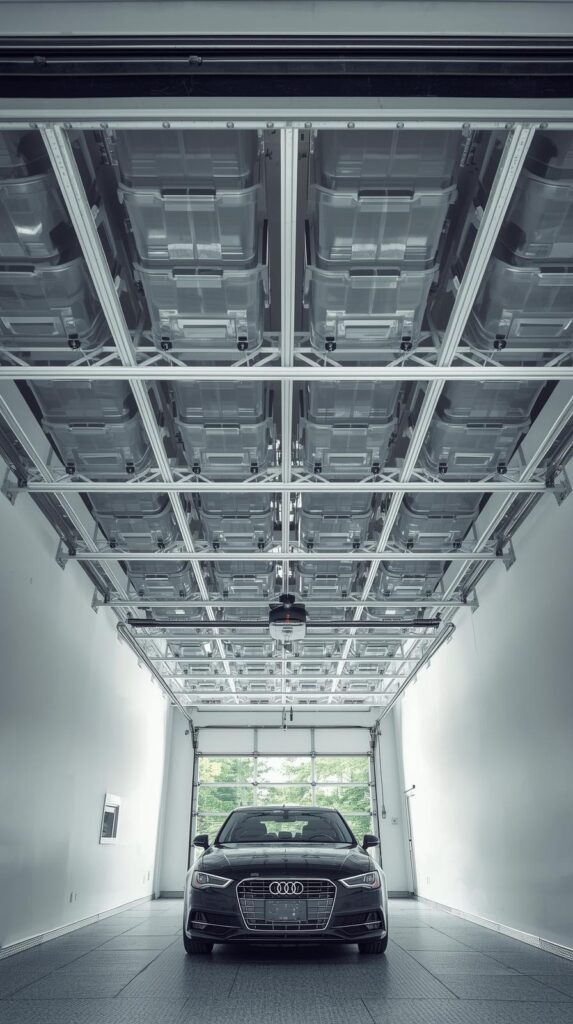
Those camping tents and holiday decorations don’t need prime real estate at eye level. You mount overhead racks to your ceiling joists and suddenly gain an entire storage zone you forgot existed.
Weight capacity matters: Check that your racks can handle at least 600 pounds – cheaper versions buckle faster than your resolve on January 2nd. You want steel construction with proper ceiling mounting hardware, not flimsy brackets that’ll dump your Christmas lights onto your windshield. Always verify your garage ceiling can support the weight before loading up.
Strategic placement wins: Install these racks over your car’s hood or trunk area where you won’t bonk your head daily. Keep the heaviest bins toward the edges near wall support, and label everything so you’re not playing “guess what’s in this box” every season. Transparent bins help too, because future-you will thank present-you for that foresight.
Read More: Hat Storage Ideas
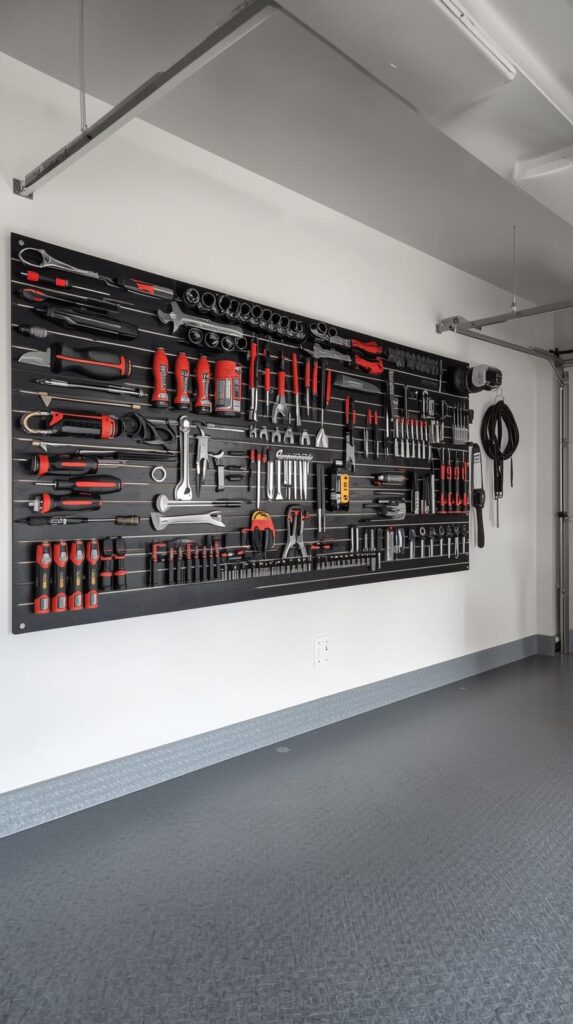
2. Build a Wall-Mounted Pegboard System
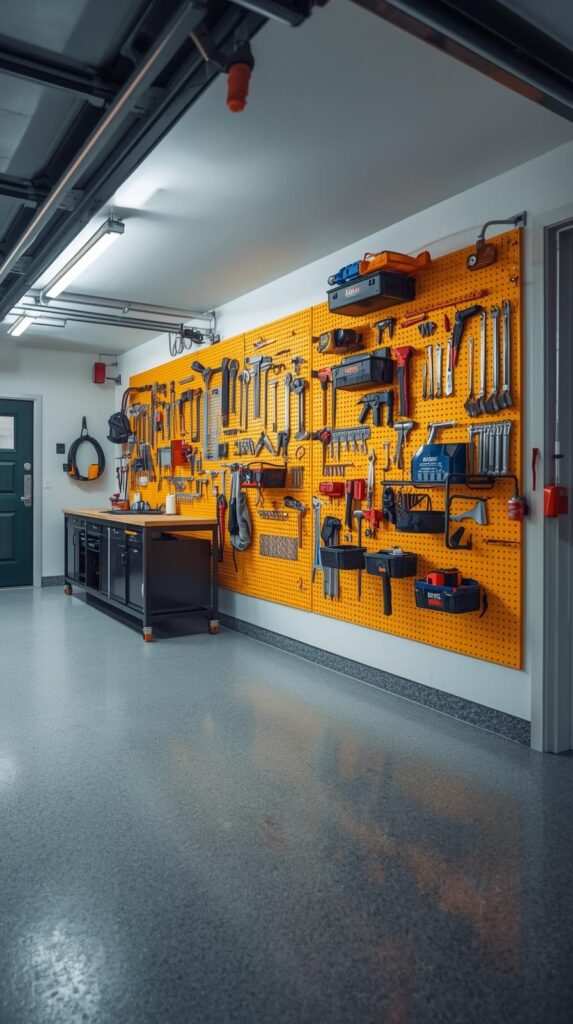
Pegboards turn vertical wall space into customizable storage magic. You hang tools, supplies, and random odds-and-ends right where you can see them instead of buried in drawers.
Go bigger than you think: A full 4×8 sheet gives you way more flexibility than those tiny pre-made panels at the hardware store. Paint it a bright color to make tools easier to spot, and outline each tool with a marker so you know exactly where everything belongs. This also reveals immediately when something’s missing – like that hammer your neighbor “borrowed.”
Layer your accessories wisely: Mix hooks, baskets, and shelves to accommodate different items. Heavy wrenches need sturdy hooks while spray paint cans sit perfectly in wire baskets pegboard accessories click in and out, so you can rearrange your setup as your storage needs evolve without drilling new holes everywhere.
Read More: Blanket Storage Ideas
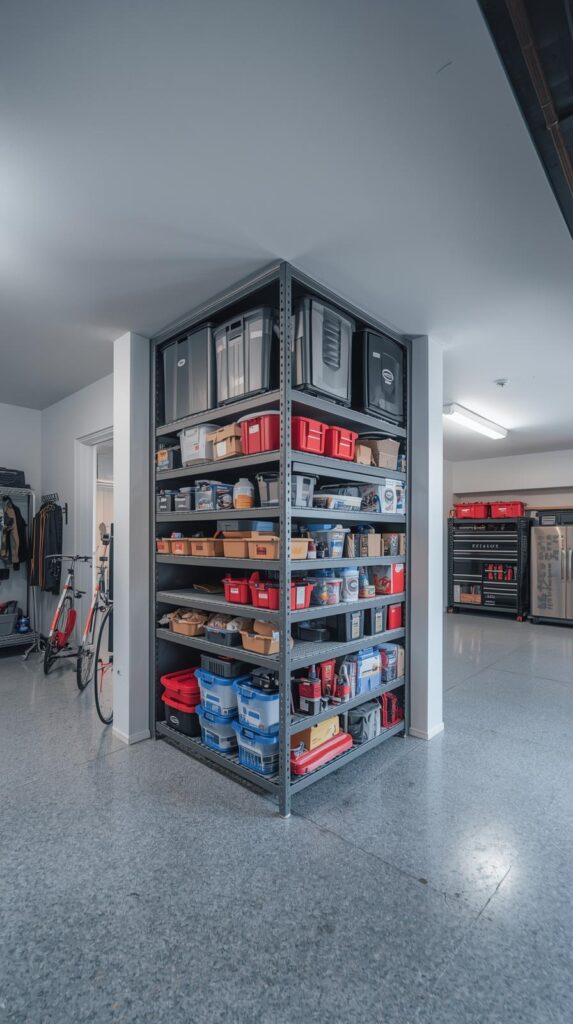
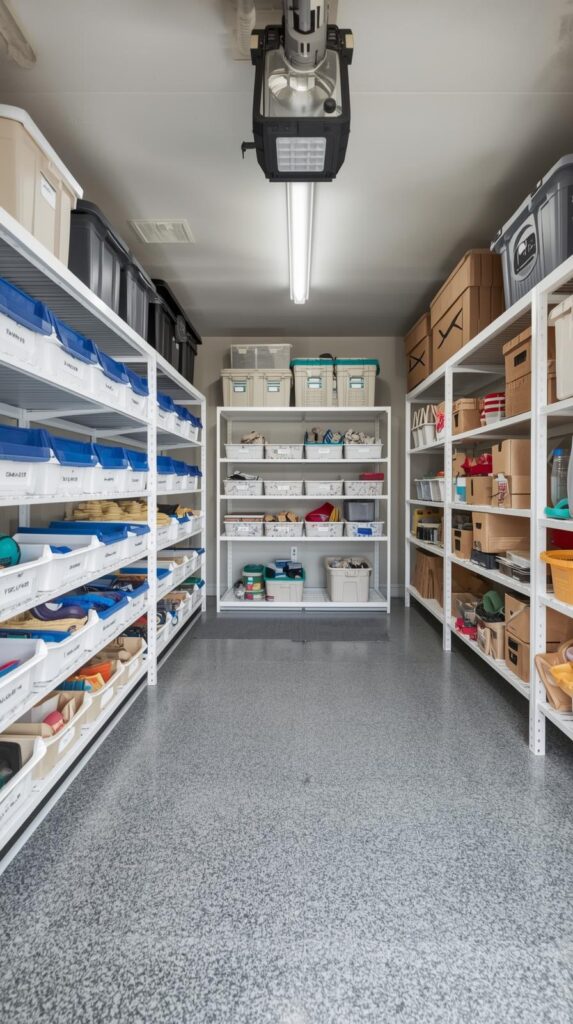
3. Create Zones with Freestanding Shelving Units
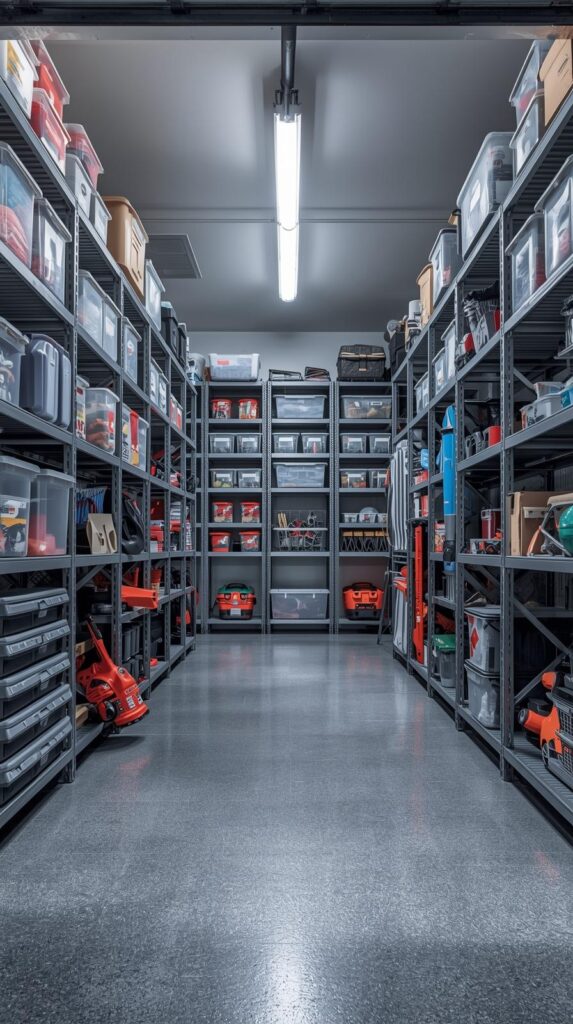
Metal shelving units divide your garage into purposeful zones – sports equipment here, gardening there, automotive stuff over there. You stop the everything-everywhere-all-at-once problem that makes garages unusable.
Choose adjustable shelves: Fixed-height shelves sound fine until you need to store something two inches taller than your spacing allows. Quality metal units with adjustable brackets let you customize each shelf height. Look for models rated for at least 200 pounds per shelf because garage stuff is surprisingly heavy.
Anchor to walls for safety: Freestanding doesn’t mean wobbling precariously when you grab something from the top shelf. Use L-brackets to secure tall units to wall studs. This prevents tip-overs and lets you stack items higher with confidence. Position your heaviest items on lower shelves and lighter bins up top for stability.
4. Hang Bikes Vertically with Wall Hooks
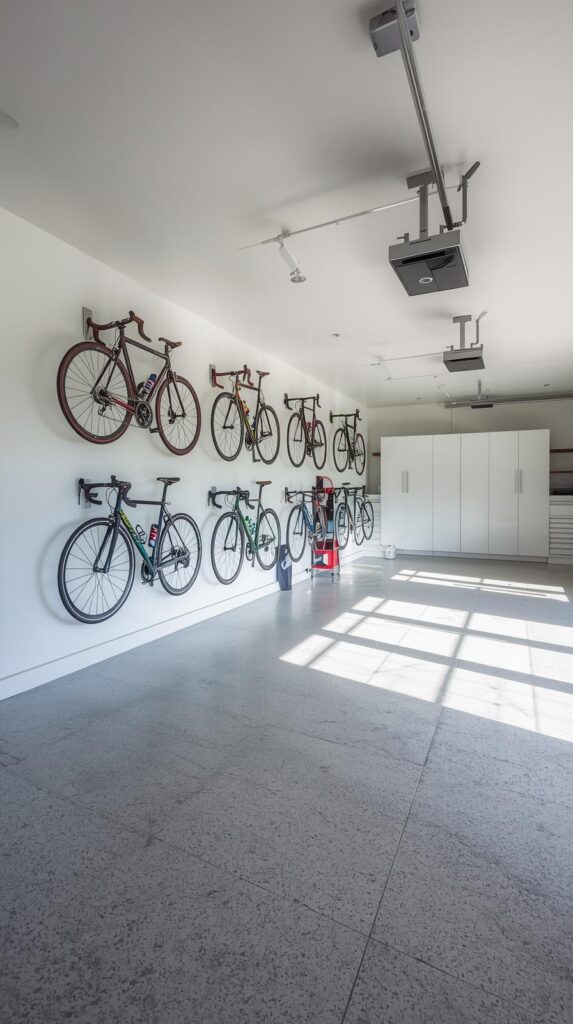
Floor-standing bikes trip you constantly and gobble up space. You flip them vertical with simple wall hooks and reclaim approximately 10 square feet per bike.
Horizontal versus vertical mounting: Vertical hooks work brilliantly for garages with high ceilings but limited wall length. Horizontal hooks suit longer walls with standard ceiling heights. Either way, mount hooks into wall studs – drywall anchors won’t cut it when your bike weighs 30 pounds and Junior yanks it down enthusiastically.
Wheel-first or seat-first positioning: Hanging bikes by their front wheel keeps handlebars from jutting out awkwardly into walkways. Some prefer seat hooks for heavier bikes since the frame supports weight better. Space hooks at least 16 inches apart horizontally so handlebars don’t clash like awkward partygoers.
5. Install Slatwall Panels for Ultimate Flexibility
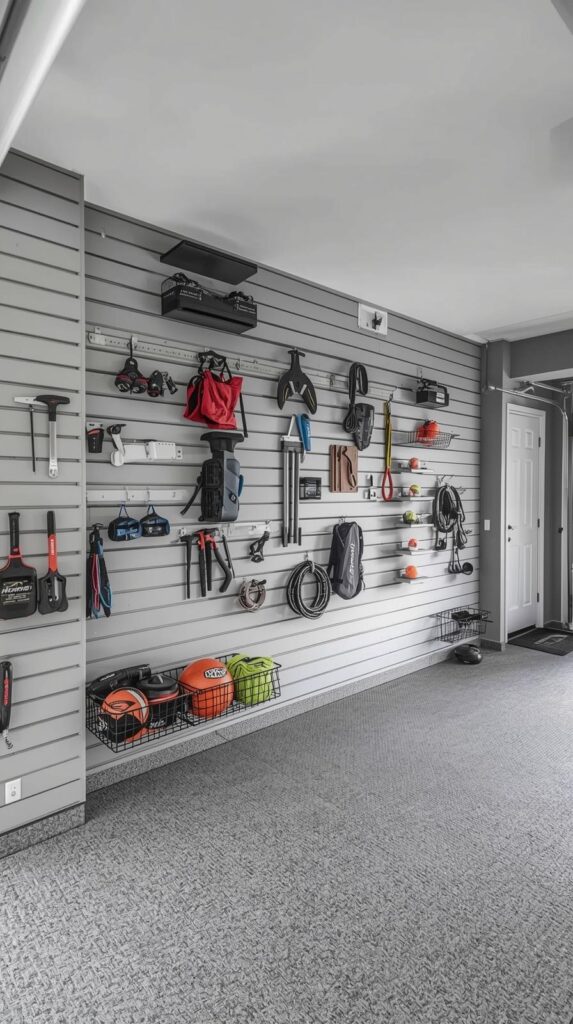
Slatwall transforms plain walls into storage command centers. You slot in hooks, baskets, and shelves anywhere along horizontal grooves, then move them around whenever your whims change.
Material quality matters hugely: PVC slatwall resists moisture and won’t warp like MDF versions in humid garages. Yeah, it costs more upfront, but soggy deteriorating walls aren’t the vibe you’re going for. Installation takes a weekend but you’ll use this system for decades.
Mix accessories strategically: Combine J-hooks for long-handled tools, wire baskets for balls and small items, and small shelves for spray bottles. The genius lies in rearranging everything without tools – just lift, move, done. Your storage evolves as your hobbies and kids’ interests change through the years.
6. Add Rolling Storage Carts for Flexible Organization
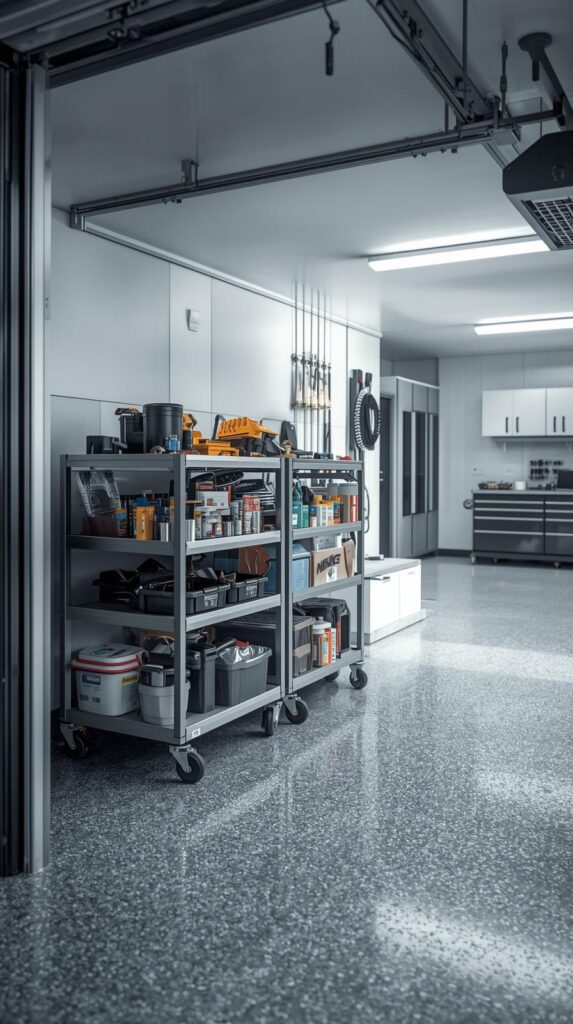
Wheeled carts move supplies exactly where you need them, then roll back out of the way. You work on projects without sprinting back and forth for forgotten tools.
Heavy-duty casters change everything: Cheap wheels jam, wobble, and generally make you regret your life choices. Invest in locking casters rated for at least 100 pounds per wheel. Two wheels should lock to prevent runaway carts during use.
Multi-tier beats single-level: Three-shelf carts pack way more utility into the same floor footprint. Top shelf for frequently-grabbed items, middle for medium supplies, bottom for heavier stuff. Some models include drawers or bins that keep small parts corralled instead of rolling around loose.
7. Mount Fold-Down Workbenches for Space Efficiency
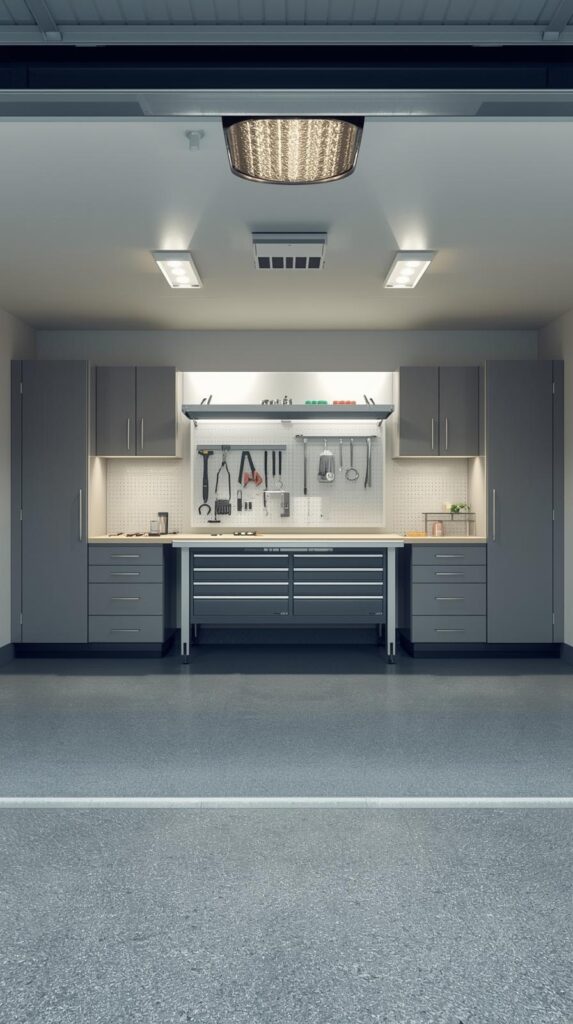
Permanent workbenches eat floor space even when you’re not using them. Wall-mounted fold-down versions give you a solid work surface that disappears when finished.
Sturdy mounting is non-negotiable: These benches cantilever off the wall supporting significant weight when you’re working. You need to hit at least three wall studs with lag bolts, not wimpy screws. Test capacity gradually before trusting it with your expensive tools.
Add integrated storage underneath: Install shelves or cabinets below the bench to maximize vertical space. When folded up, the bench covers your storage neatly. Some clever DIY designs incorporate tool racks on the bench’s underside that face out when folded, creating double-duty storage.
8. Use Clear Plastic Bins with Labels
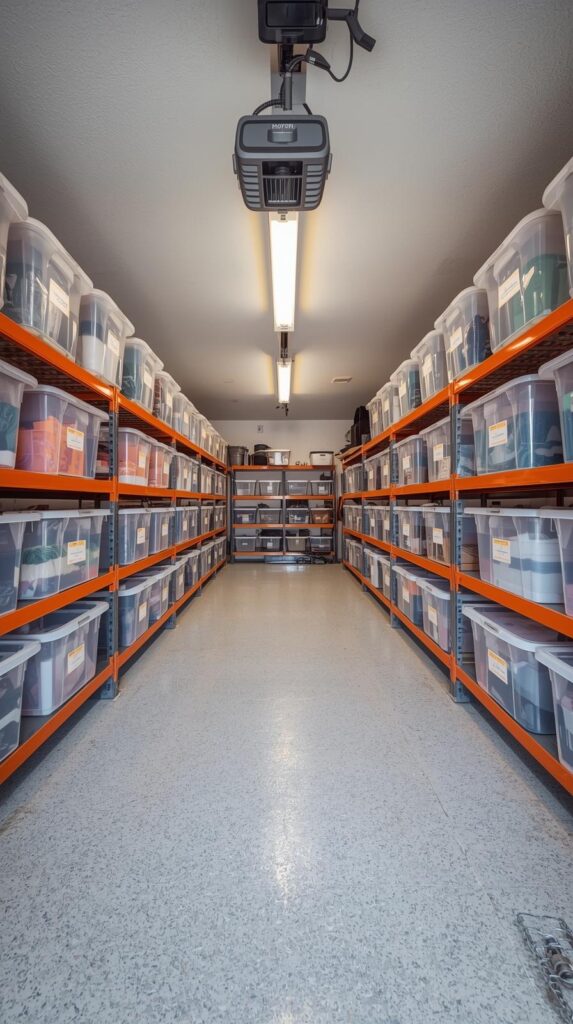
Cardboard boxes deteriorate, attract pests, and hide their contents like they’re guarding state secrets. Clear plastic bins solve all three problems simultaneously while stacking neatly.
Size variety serves you better: Mix large bins for bulky seasonal items with smaller ones for specific categories. Uniform-brand bins stack more securely than random-sized containers playing Jenga. Weatherproof bins with gasket seals protect contents from moisture and dust infiltration.
Label everything obsessively: Even clear bins need labels because you can’t identify objects through three stacked layers. Use a label maker or permanent marker on tape – and list contents on multiple sides. Include dates when relevant so you know that paint is from 2019 and probably garbage.
9. Install Track Systems for Yard Tools
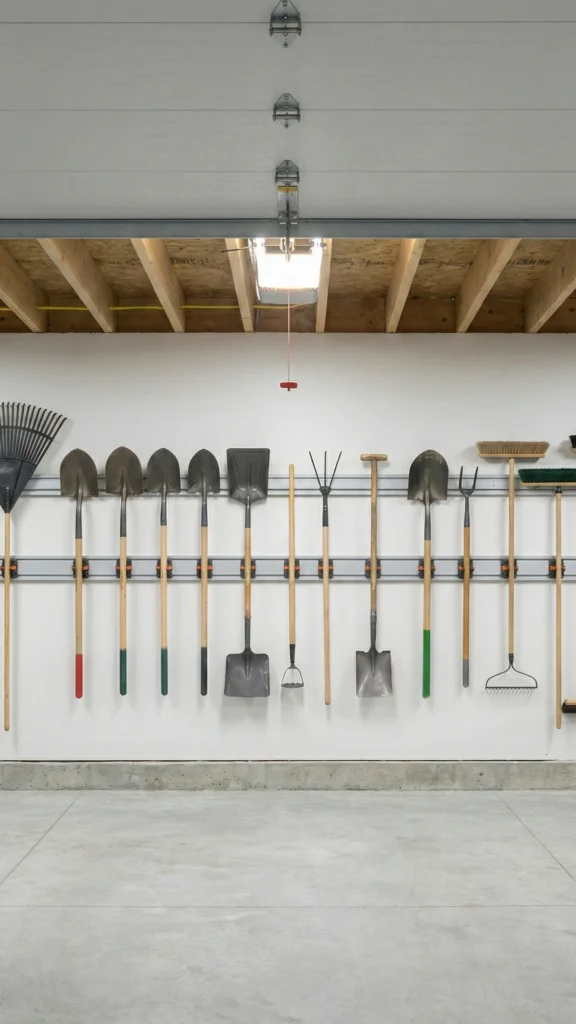
Long-handled tools lean precariously in corners until they avalanche onto your head. Track systems with adjustable clips hold rakes, shovels, and brooms securely against walls.
Rubber-coated clips protect handles: Metal clips alone can damage wooden handles over time. Quality systems include protective coating that grips tools firmly without scratching. You slide clips along the track to accommodate different handle widths and arrange tools however makes sense.
Mount at appropriate heights: Position tracks so tool heads sit above head-bumping level but handles remain within reach. Most people install these around 5-6 feet high. Heavier tools like post-hole diggers need sturdier clips than lightweight leaf rakes.
10. Create Lumber Storage Racks
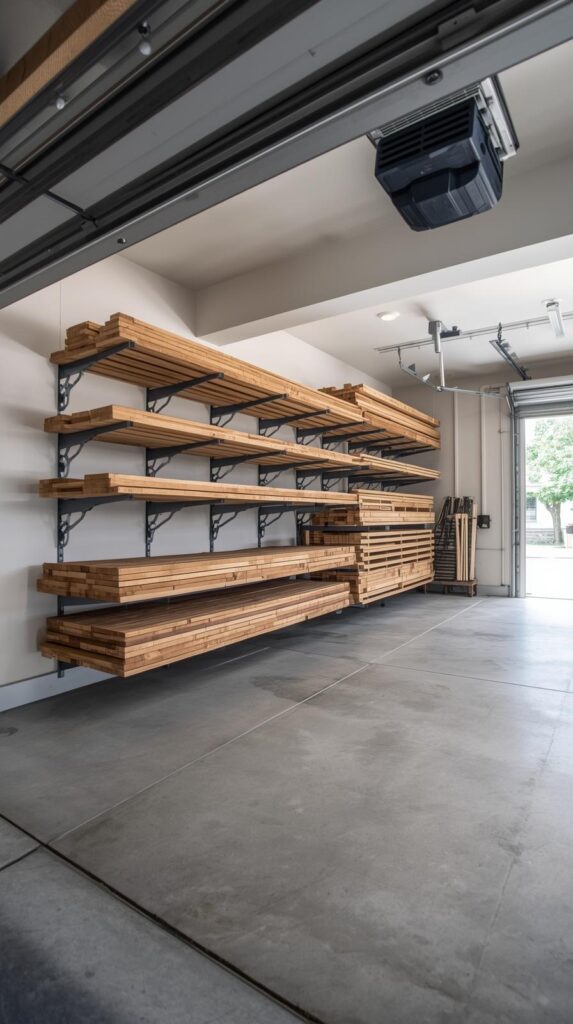
Wood scraps, leftover boards, and future project materials pile up fast. Horizontal wall-mounted racks keep lumber organized, visible, and less likely to warp from improper storage.
Cantilever brackets work best: These L-shaped brackets bolt into wall studs and extend outward to support long boards. Space brackets every 2-3 feet along the wall. Deeper brackets (12-16 inches) accommodate wider boards without overhanging awkwardly.
Sort by length and type: Group similar lengths together so you can quickly spot what you need. Separate pressure-treated lumber from regular wood, and hardwoods from softwoods. Store boards flat or on edge – never leaning, which causes warping faster than you can say “that used to be straight.”
11. Add Magnetic Tool Strips for Small Metal Items
Those tiny drill bits, screwdrivers, and wrenches vanish into tool drawers never to be seen again. Magnetic strips mounted on walls grab metal tools and display them clearly.
Industrial-strength magnets only: Craft-store magnetic strips drop tools constantly because they’re meant for refrigerator photos, not wrenches. Professional-grade strips feature neodymium magnets that’ll hold hefty tools without sliding. Mount them at comfortable reaching height near your work area.
Group tools logically: Dedicate one strip to drill bits and drivers, another to wrenches, and so on. This visual organization means you grab exactly what you need immediately. You also notice instantly when tools haven’t been returned to their spots.
12. Install Corner Shelving Units
Garage corners usually collect cobwebs and awkwardly-shaped items that don’t fit anywhere else. Purpose-built corner shelves convert wasted space into surprisingly useful storage.
Rotating corner units maximize access: Lazy Susan-style shelving brings items from the back corner within easy reach. Fixed corner shelves work fine too, just accept you’ll need to move front items to reach back ones. Wire shelving prevents dust accumulation better than solid shelves.
Height matters for corner efficiency: Tall corner units (floor to ceiling) capitalize on vertical space spectacularly. Lower units waste potential but work better if you’re storing particularly heavy items. Secure tall corner units to both adjoining walls for stability.
13. Use Tension Rods for Spray Bottle Storage
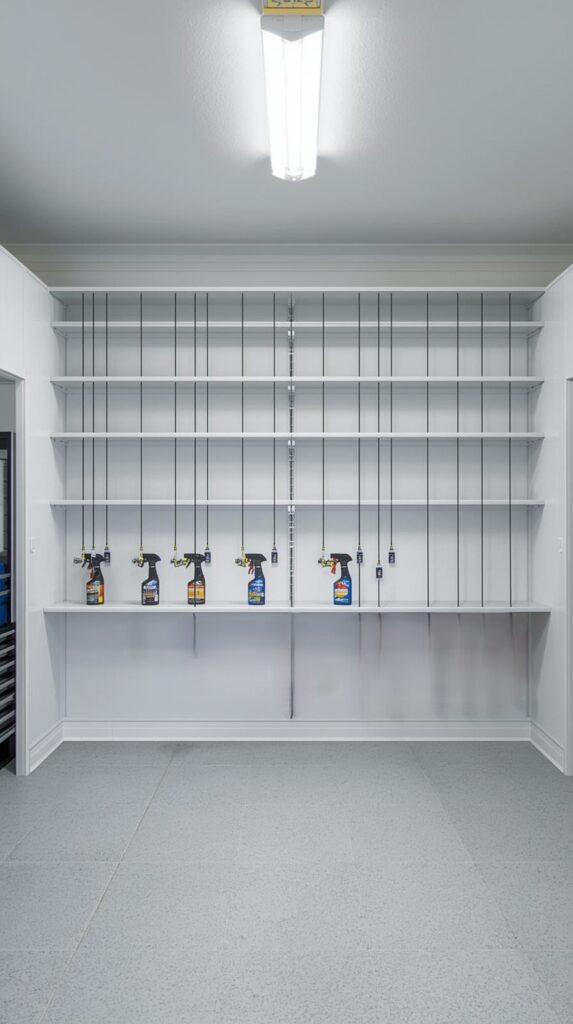
Spray bottles tip over constantly in cabinets and shelves. You install tension rods vertically between two shelves and slide bottle triggers over the rods.
Spacing determines capacity: Position rods about 4 inches apart to accommodate standard spray bottle widths. This works brilliantly inside cabinets, between wall studs, or along open shelving. Bottles hang trigger-down and can’t fall over no matter how vigorously you grab them.
Clear labeling prevents mix-ups: When bottles hang trigger-down, labels face weird directions. Add colored tape or write on bottle tops so you know which is window cleaner versus all-purpose spray. This prevents that special moment when you discover you just sprayed degreaser on your windshield.
14. Mount Hose Reels to Exterior Walls
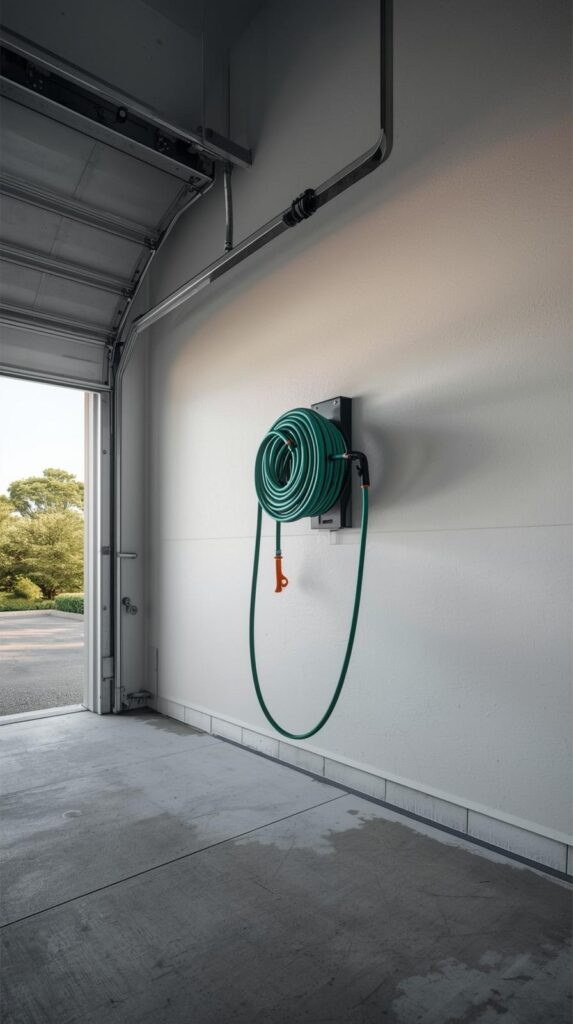
Garden hoses left on the floor tangle like angry snakes and develop kinks that restrict water flow. Wall-mounted reels keep hoses coiled properly and extend their lifespan considerably.
Auto-rewind versus manual cranks: Auto-rewind reels cost more but save significant effort – you pull the hose out, use it, then watch it retract automatically. Manual crank reels need more elbow grease but offer zero mechanical failures. Both beat dragging tangled hoses around your yard like reluctant pets.
Weather protection extends life: Look for reels with protective cases that shield hoses from UV damage and extreme temperatures. Mount reels near outdoor spigots to minimize connection distance. Some models include storage compartments for spray nozzles and accessories.
15. Create a Seasonal Rotation System
You don’t need beach toys accessible in January or snow shovels in July. Designated seasonal zones that rotate keep currently-relevant items within easy reach.
Front versus back placement: Store current-season items in prime spots near the garage entrance. Off-season stuff moves to higher shelves, back corners, or overhead racks. Swap positions every few months so you’re not climbing ladders for sunscreen in summer.
Clearly marked containers simplify switches: Label bins by season or month ranges. “March-May Gardening” tells you exactly when to pull that container forward. This system works especially well for families with kids’ sports equipment that changes seasonally.
16. Install Pull-Out Drawer Systems
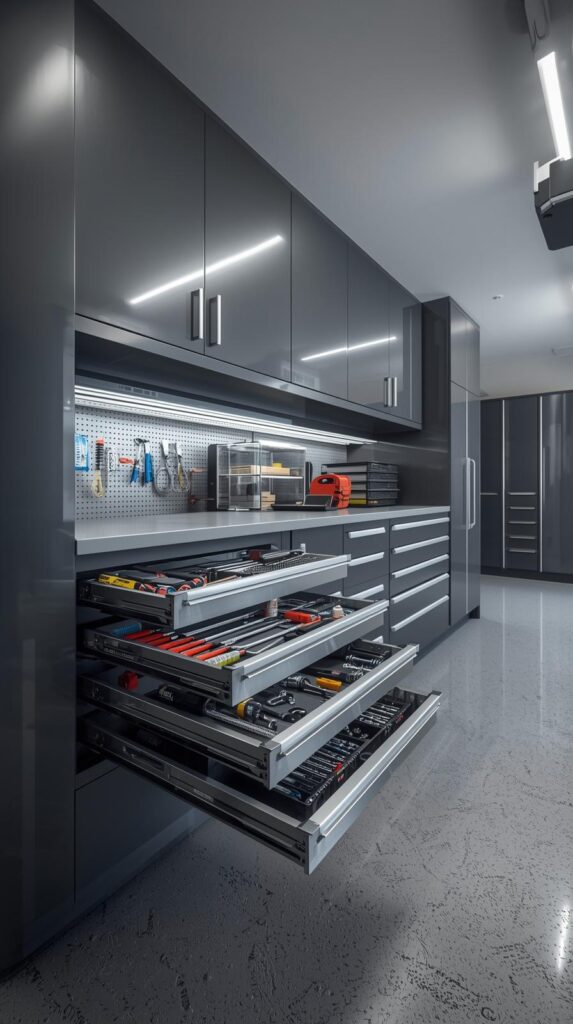
Regular shelves require moving front items to reach back ones, like some annoying storage puzzle. Pull-out drawer systems slide completely out so you see and access everything.
Heavy-duty slides support weight: Quality ball-bearing slides rated for 100+ pounds let you load drawers properly. Cheaper slides stick, jam, and generally frustrate you into abandoning the whole system. Test slides fully extended before loading – they should glide smoothly.
Depth customization matters: Shallow drawers suit small hardware and craft supplies, while deep drawers work for power tools and bulkier items. Mix depths based on what you’re storing. Soft-close mechanisms prevent aggressive drawer-slamming that damages contents and mechanism alike.
17. Add Overhead Door Storage Racks
Your garage door travels up and down daily, but the wall space beside it sits empty. Door track storage systems utilize this overlooked zone brilliantly.
Ensure proper clearance: These racks mount beside door tracks, not in front of them. You need several inches clearance so stored items don’t interfere with door operation. Check measurements carefully – miscalculation means either blocked doors or useless racks.
Weight limits are serious: Garage door walls aren’t designed for massive weight loads. Most systems safely hold 50-100 pounds total. Perfect for lightweight seasonal decorations or camping gear, less ideal for your anvil collection. Overloading can damage door mechanisms or walls.
18. Use Bungee Cord Systems for Ball Storage
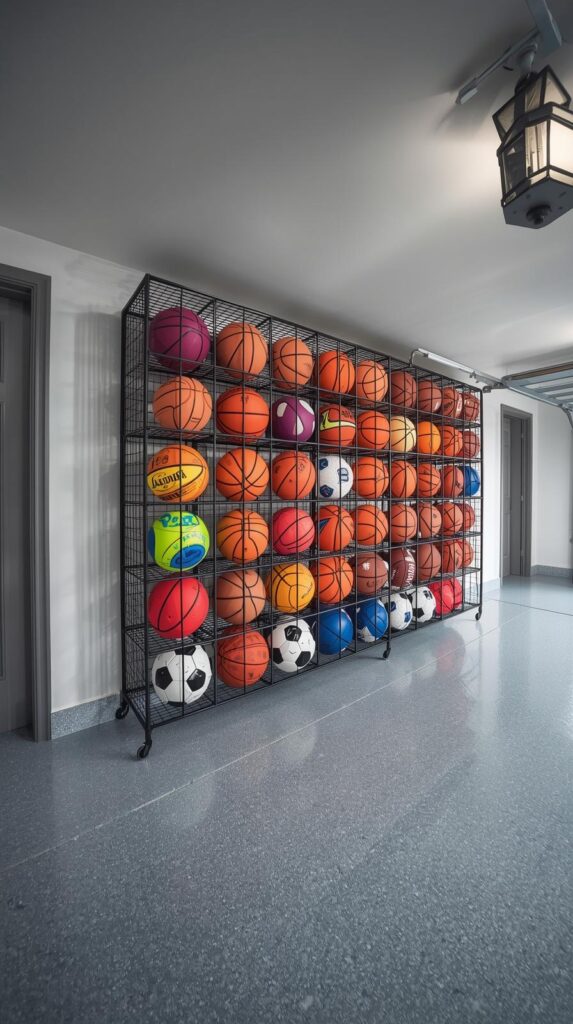
Sports balls roll everywhere creating tripping hazards and disappearing acts. Bungee cord cages mounted to walls corral them neatly while keeping them visible and accessible.
DIY versus pre-made solutions: You can build simple ball corrals by mounting a rectangular frame and crisscrossing bungee cords, or buy pre-made wire ball cages. DIY costs less but requires more effort. Either way, mount these at kid-accessible heights so they actually put balls away.
Capacity planning prevents overcrowding: A moderately-sized cage holds 8-12 balls comfortably. Overstuffing makes removal difficult and balls pop out spontaneously. If you’ve got a serious ball collection (basketball, soccer, football, volleyball, etc.), you need multiple storage points or a larger system.
19. Install Adjustable Shelving in Cabinets
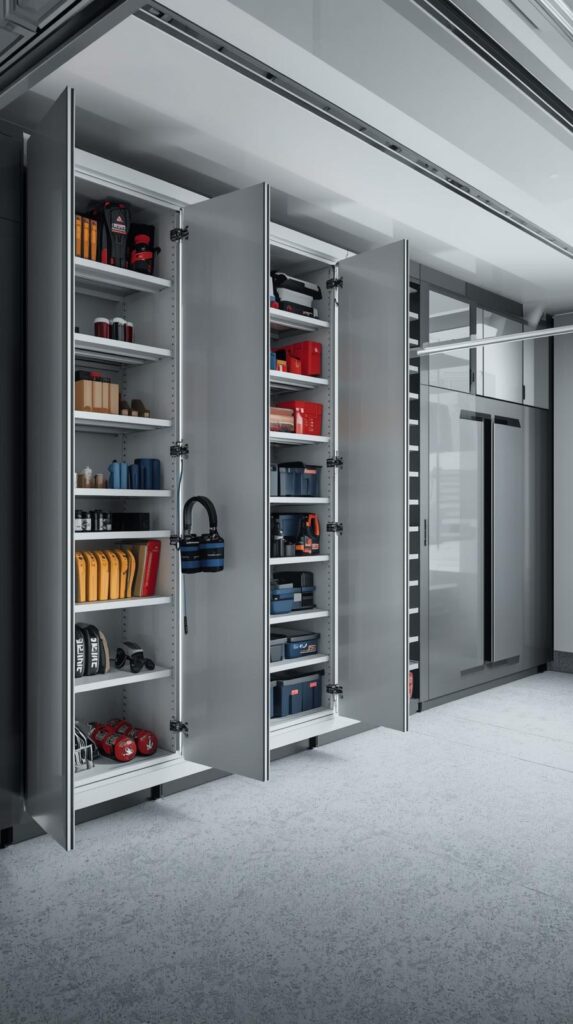
Fixed cabinet shelves waste massive amounts of vertical space – you’ve got 18 inches between shelves but items are only 6 inches tall. Adjustable shelving adapts to what you’re actually storing.
Peg-style adjustments offer flexibility: Drill holes at regular intervals along cabinet sides and use shelf pegs to position shelves wherever needed. This lets you reconfigure storage as your stuff changes without permanent alterations.
Group items by height: After installing adjustable shelves, group similar-height items together so you minimize wasted vertical space. Tall bottles get tall spaces, short cans get compact spaces. This seemingly obvious step can double your effective storage capacity immediately.
20. Create a Donation Station
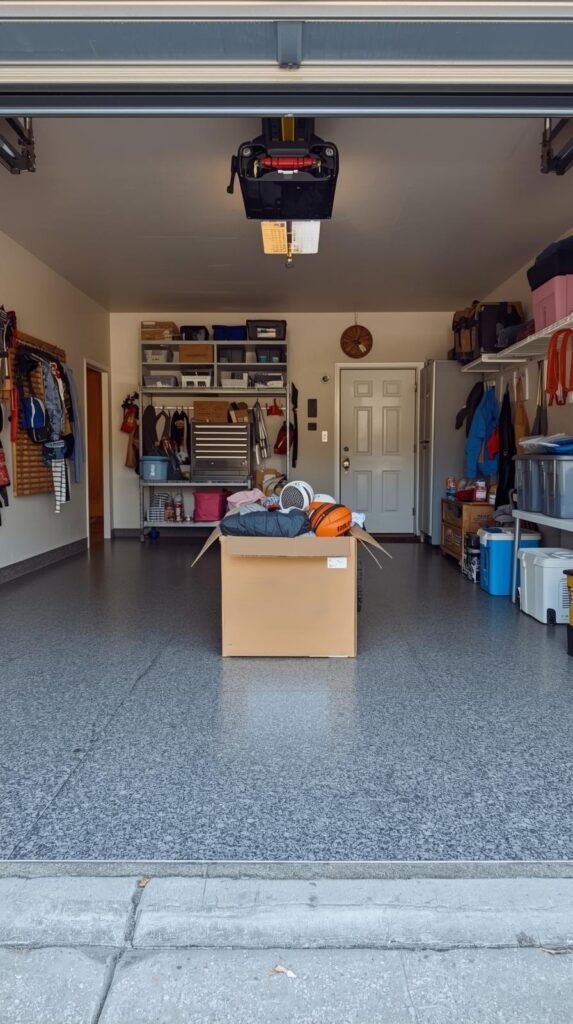
Garages accumulate outgrown sports equipment, redundant tools, and forgotten hobbies. A dedicated “donation station” box prevents good items from languishing forever while new stuff piles up.
Make it visible and accessible: Tuck the donation box away and you’ll forget it exists – items need to go in easily when you’re sorting. Keep it near your garage entrance where you naturally pass through. Set calendar reminders to actually deliver donations quarterly.
One-year rule prevents hoarding: If something sits untouched for a full year, you probably don’t need it. Be honest about that bread maker from 2017 or those rollerblades from before kids. Someone else will use them; you’re just warehousing them pointlessly.
21. Add Fold-Down Drying Racks

Wet sporting equipment, freshly-painted projects, or muddy gardening gear need drying space. Wall-mounted fold-down racks provide air circulation, then collapse flat when dry.
Mesh or slat design allows airflow: Solid surfaces trap moisture underneath items, defeating the purpose. Look for open-grid designs that let air circulate completely around drying items. Stainless steel or powder-coated metal resists rust from moisture exposure.
Multiple racks serve different needs: Mount one low for kids’ gear, another higher for adult items. Some fold-down racks include hooks for hanging items, while others provide flat surfaces. Position racks where dripping won’t damage floors or stored items below.
Final Thoughts
Your garage doesn’t need to be a beautifully styled showroom – it needs to work for your actual life. Start with whatever storage solution bugs you most (probably those bikes, right?) and tackle one project at a time. You’ll discover that organizing actually becomes satisfying once you see real results instead of just moving chaos from one spot to another. Pick one idea from this list this weekend, grab your drill, and reclaim that space. Your car might even remember what it feels like to sleep indoors again. And honestly, finding your tools on the first try instead of the seventeenth? That’s the kind of small victory that makes adulting slightly less annoying.
Pingback: 21 Genius Shoe Storage Ideas for Every Home - Simple Cozy Homes
Pingback: 21 Stunning Thanksgiving decor ideas for your home 2026 - Simple Cozy Homes
Pingback: 21 Coastal Christmas Decorations That'll Make Your Beach House Merry - Simple Cozy Homes
Pingback: 20 Dorm Room Ideas That Instantly Feel Cozy 2026 - Simple Cozy Homes